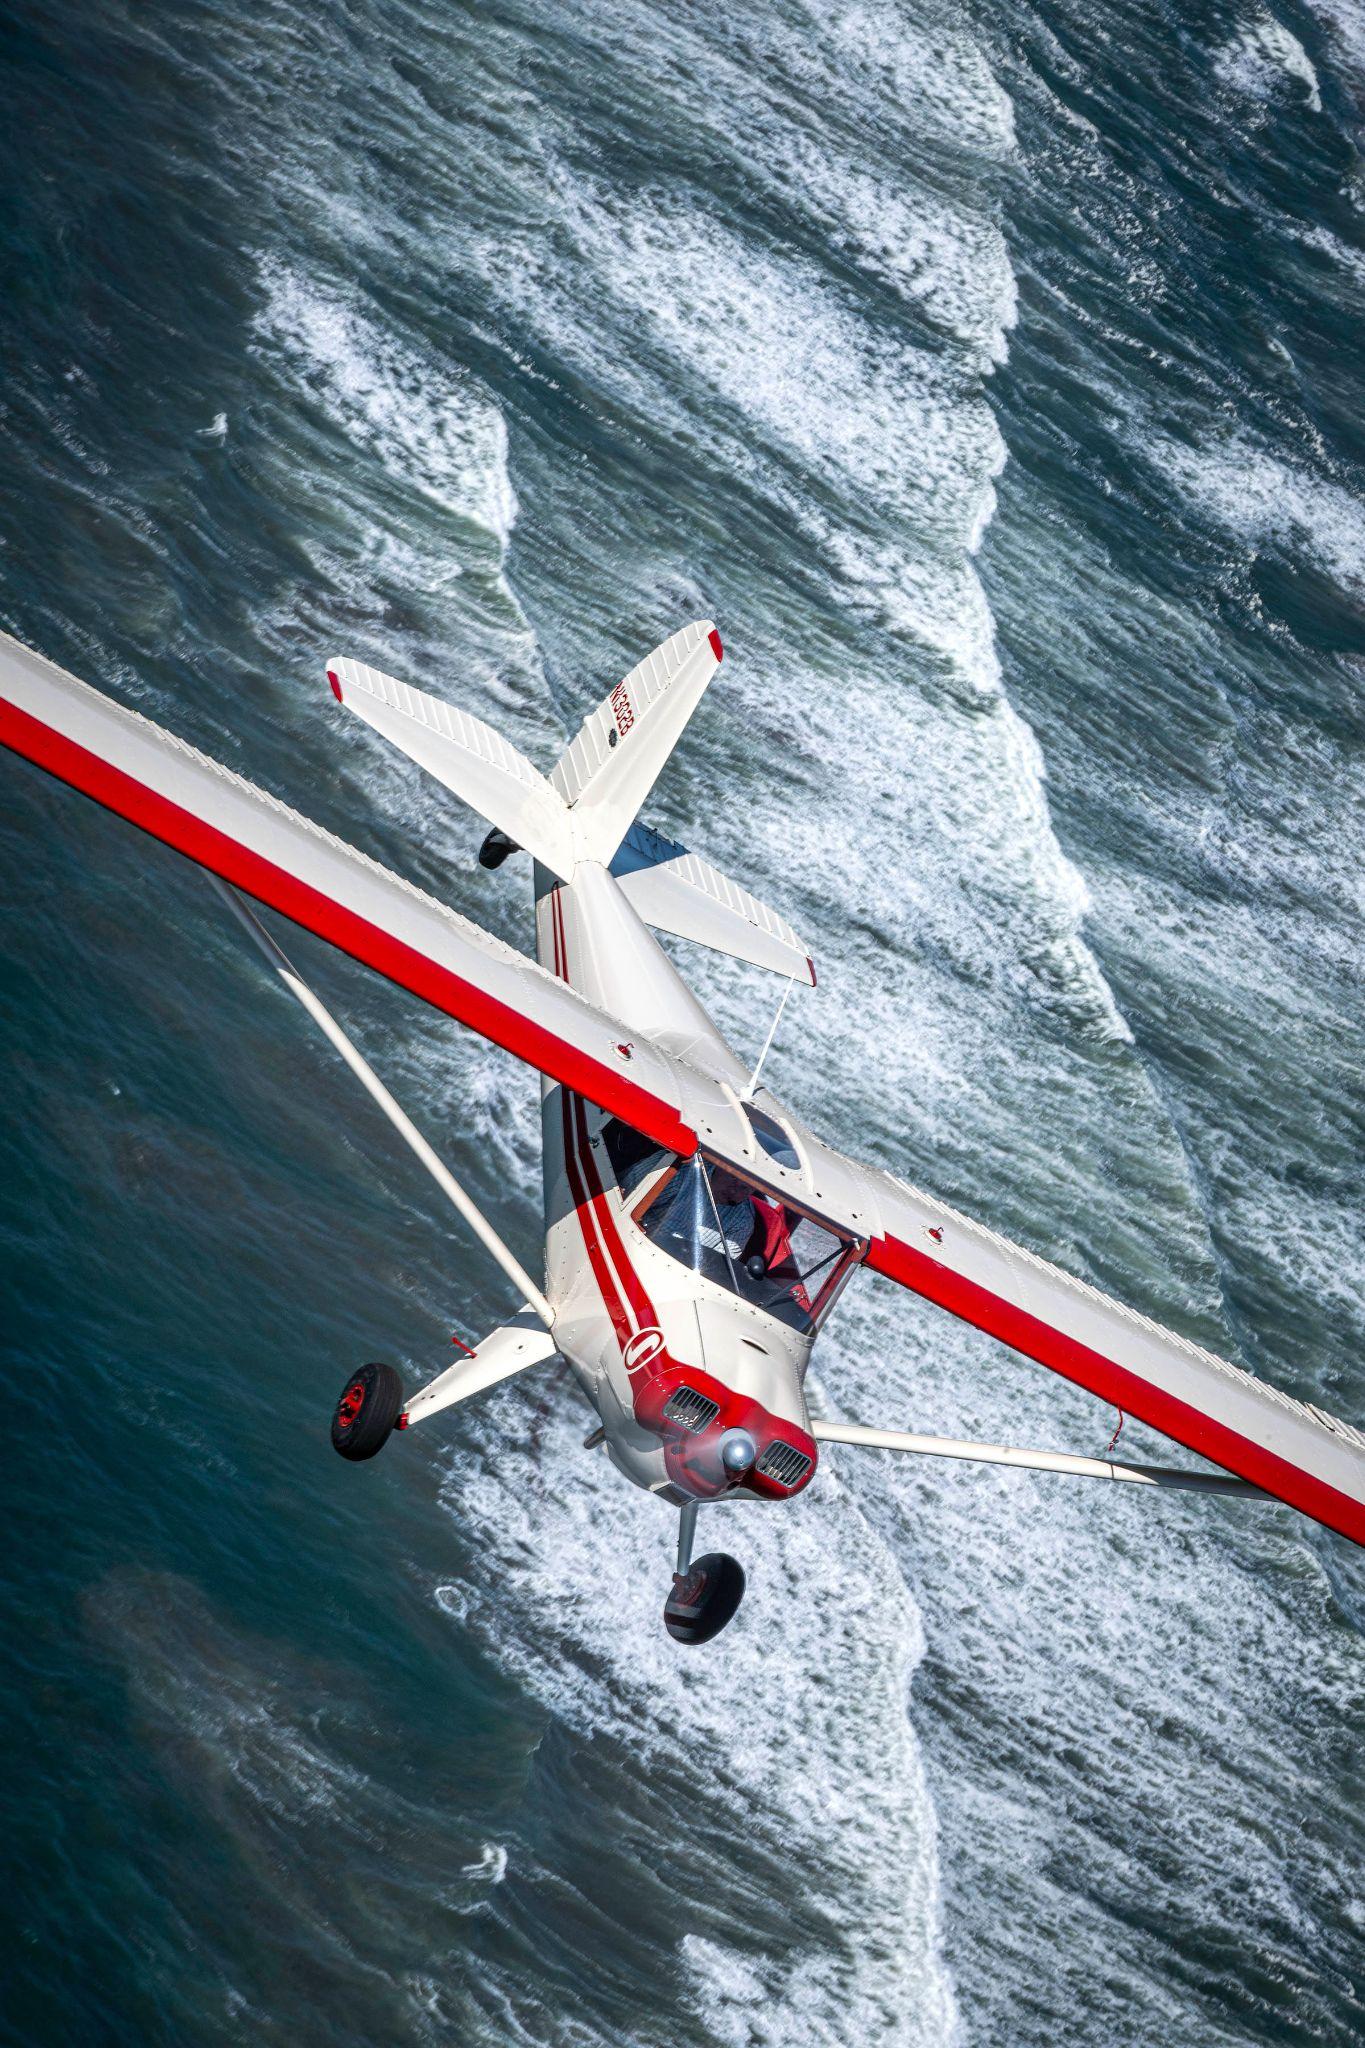
Fearless
Tailwheel
Flying
A North Aero Publication
Version 2.0, 2026-08-17. www.flynorthaero.com
A North Aero Publication
Version 2.0, 2026-08-17. www.flynorthaero.com
A tailwheel airplane will not let you be casual with your feet. That is the whole of its reputation, and it is also the reason pilots come out of this course flying everything else better than they did going in.
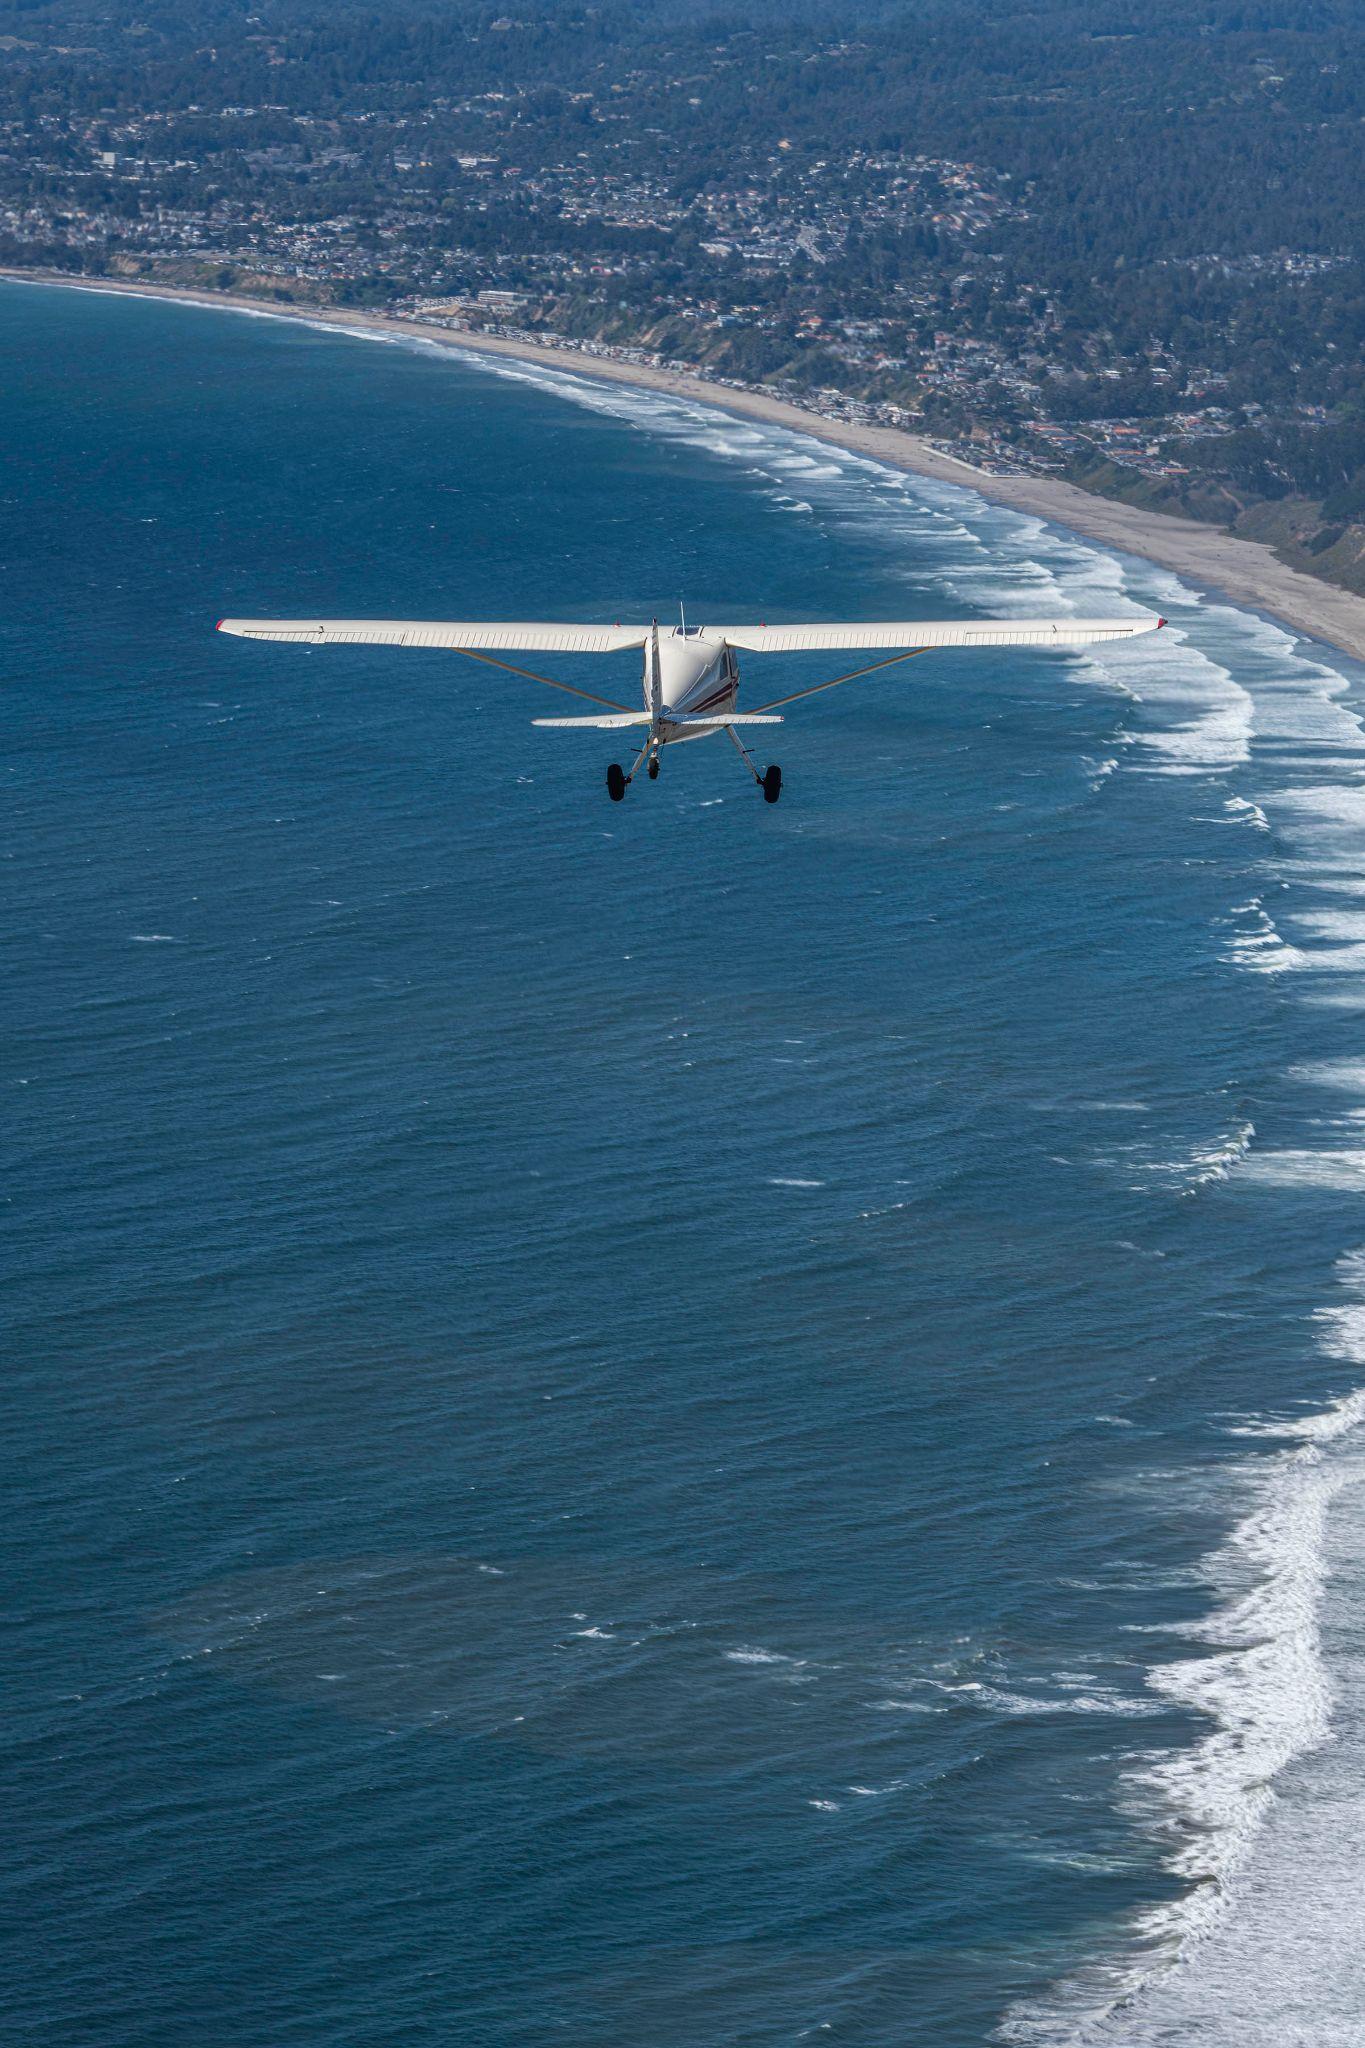
This course covers the differences in handling and flying characteristics between tricycle gear and conventional gear airplanes. It trains each pilot to understand ground handling and flight characteristics well enough to be proficient in the operation of a tailwheel airplane, which is the standard the endorsement is written against.
Three phases of training prepare you for the endorsement under 14 CFR 61.31(i). Each phase builds on the one before it, and the conditions get harder as it goes. You will fly all of it in one airplane, the Luscombe 8E N1302B, at Salinas (KSNS).
A pilot who already holds the endorsement and wants a tune-up is not doing part of this program. That is the recurrent proficiency track, which is assessed against these same completion standards, is one or two sessions rather than five lessons, and issues no endorsement because you already have one. Ask about it by name.
Remember: there are few bad airplanes, and a great many bad pilots.
The endorsement is not the goal of this program. A pilot who understands the airplane, respects what it does on the ground, and can operate it safely in the conditions it meets at Salinas is the goal. The endorsement follows from that.
Phase 1: Aircraft familiarization and basic flight. Lessons 1 and 2. Operating the airplane on the ground and in the air. Taxiing, takeoffs, steep turns, stalls, slips, and your first exposure to the landing environment. Most of the first lesson is spent on the ground, on purpose.
Phase 2: Landing techniques. Lesson 3. Three-point landings and wheel landings, taught as two distinct techniques with their own energy and attitude targets, plus short and soft field work and bounce recovery. Calm wind, or wind straight down the runway.
Phase 3: Crosswind operations. Lessons 4 and 5. Handling the airplane in a crosswind on takeoff and on landing, and simulated power failures to a spot. This is the phase the endorsement decision is made in. It is made on demonstrated proficiency against the completion standards in each lesson, and not on hours flown.
Membership is not a discount scheme. It is the mechanism that makes solo rental of N1302B available at all, and the reduced aircraft rate comes with it. The 10% discount covers all instruction, ground and flight. Dues are monthly, are not refundable, and are not credited against rental time.
| Lesson | Ground | Dual | Member | Non-member |
|---|---|---|---|---|
| L1 Familiarization and basic flight | 1.5 | 1.5 | $582.00 | $742.50 |
| L2 Takeoffs and landing demonstrations | 1.0 | 1.5 | $510.00 | $662.50 |
| Phase 1 subtotal | 2.5 | 3.0 | $1,092.00 | $1,405.00 |
| L3 Three-point and wheel landings | 0.5 | 2.0 | $560.00 | $750.00 |
| Phase 2 subtotal | 0.5 | 2.0 | $560.00 | $750.00 |
| L4 Crosswind operations | 1.0 | 1.5 | $510.00 | $662.50 |
| L5 Crosswind review and power failures | 1.0 | 3.0 | $876.00 | $1,165.00 |
| Phase 3 subtotal | 2.0 | 4.5 | $1,386.00 | $1,827.50 |
| Flying and instruction | 5.0 | 9.5 | $3,038.00 | $3,982.50 |
| Club dues, 2 months | $400.00 | none | ||
| Program total | 5.0 | 9.5 | $3,438.00 | $3,982.50 |
The member column applies the 10% instruction discount and carries two months of dues, which is what a pilot flying roughly weekly takes to finish five lessons. A pilot who takes longer pays more in dues and one who finishes sooner pays less, so that is the only line in the table that moves with the calendar rather than with flying. Membership comes out about $544.50 cheaper across the endorsement alone, before any time-building begins.
This is a good-faith estimate and not a guarantee. Most pilots complete the five lessons as written. Some need an additional lesson or two to reach the standard, and an additional lesson is a repeat of the one whose standard was not met rather than a new lesson number. The endorsement is issued on demonstrated proficiency, not on hours flown. Aircraft and instruction are billed hourly after each lesson. There is no prepayment and no block purchase.
This is a study aid. It is the long-form version of the ground material in the five lessons, written so that you can read the airplane's systems as one connected explanation rather than meeting them a topic at a time. It is not a cockpit document and it is not the syllabus. The lessons carry the completion standards you are graded against, and the checklist in the airplane is the one you run in the airplane.
Every aircraft figure in here is checked against AIRCRAFT.md, which is the single source of truth for every V-speed, weight, fuel, and engine figure in this program and holds the source, the page, and the reading date for each one. Every rate and total is checked against PRICING.md the same way. A script runs both checks over this file, so a figure that drifts out of agreement stops being publishable rather than quietly staying wrong.
That arrangement is new as of version 2.0, and it exists because of what the first version was still saying in August. It published a never exceed speed above the red line, an empty weight 87 lb lighter than the airplane weighs, a program cost that matched neither a member's nor a non-member's, four phases in a three-phase program, and an engine failure memory item telling you to set flaps in an airplane that has none. None of that was found by rereading it. It was found by putting it somewhere a checker could reach.
Built in 1948, it is still making pilots.
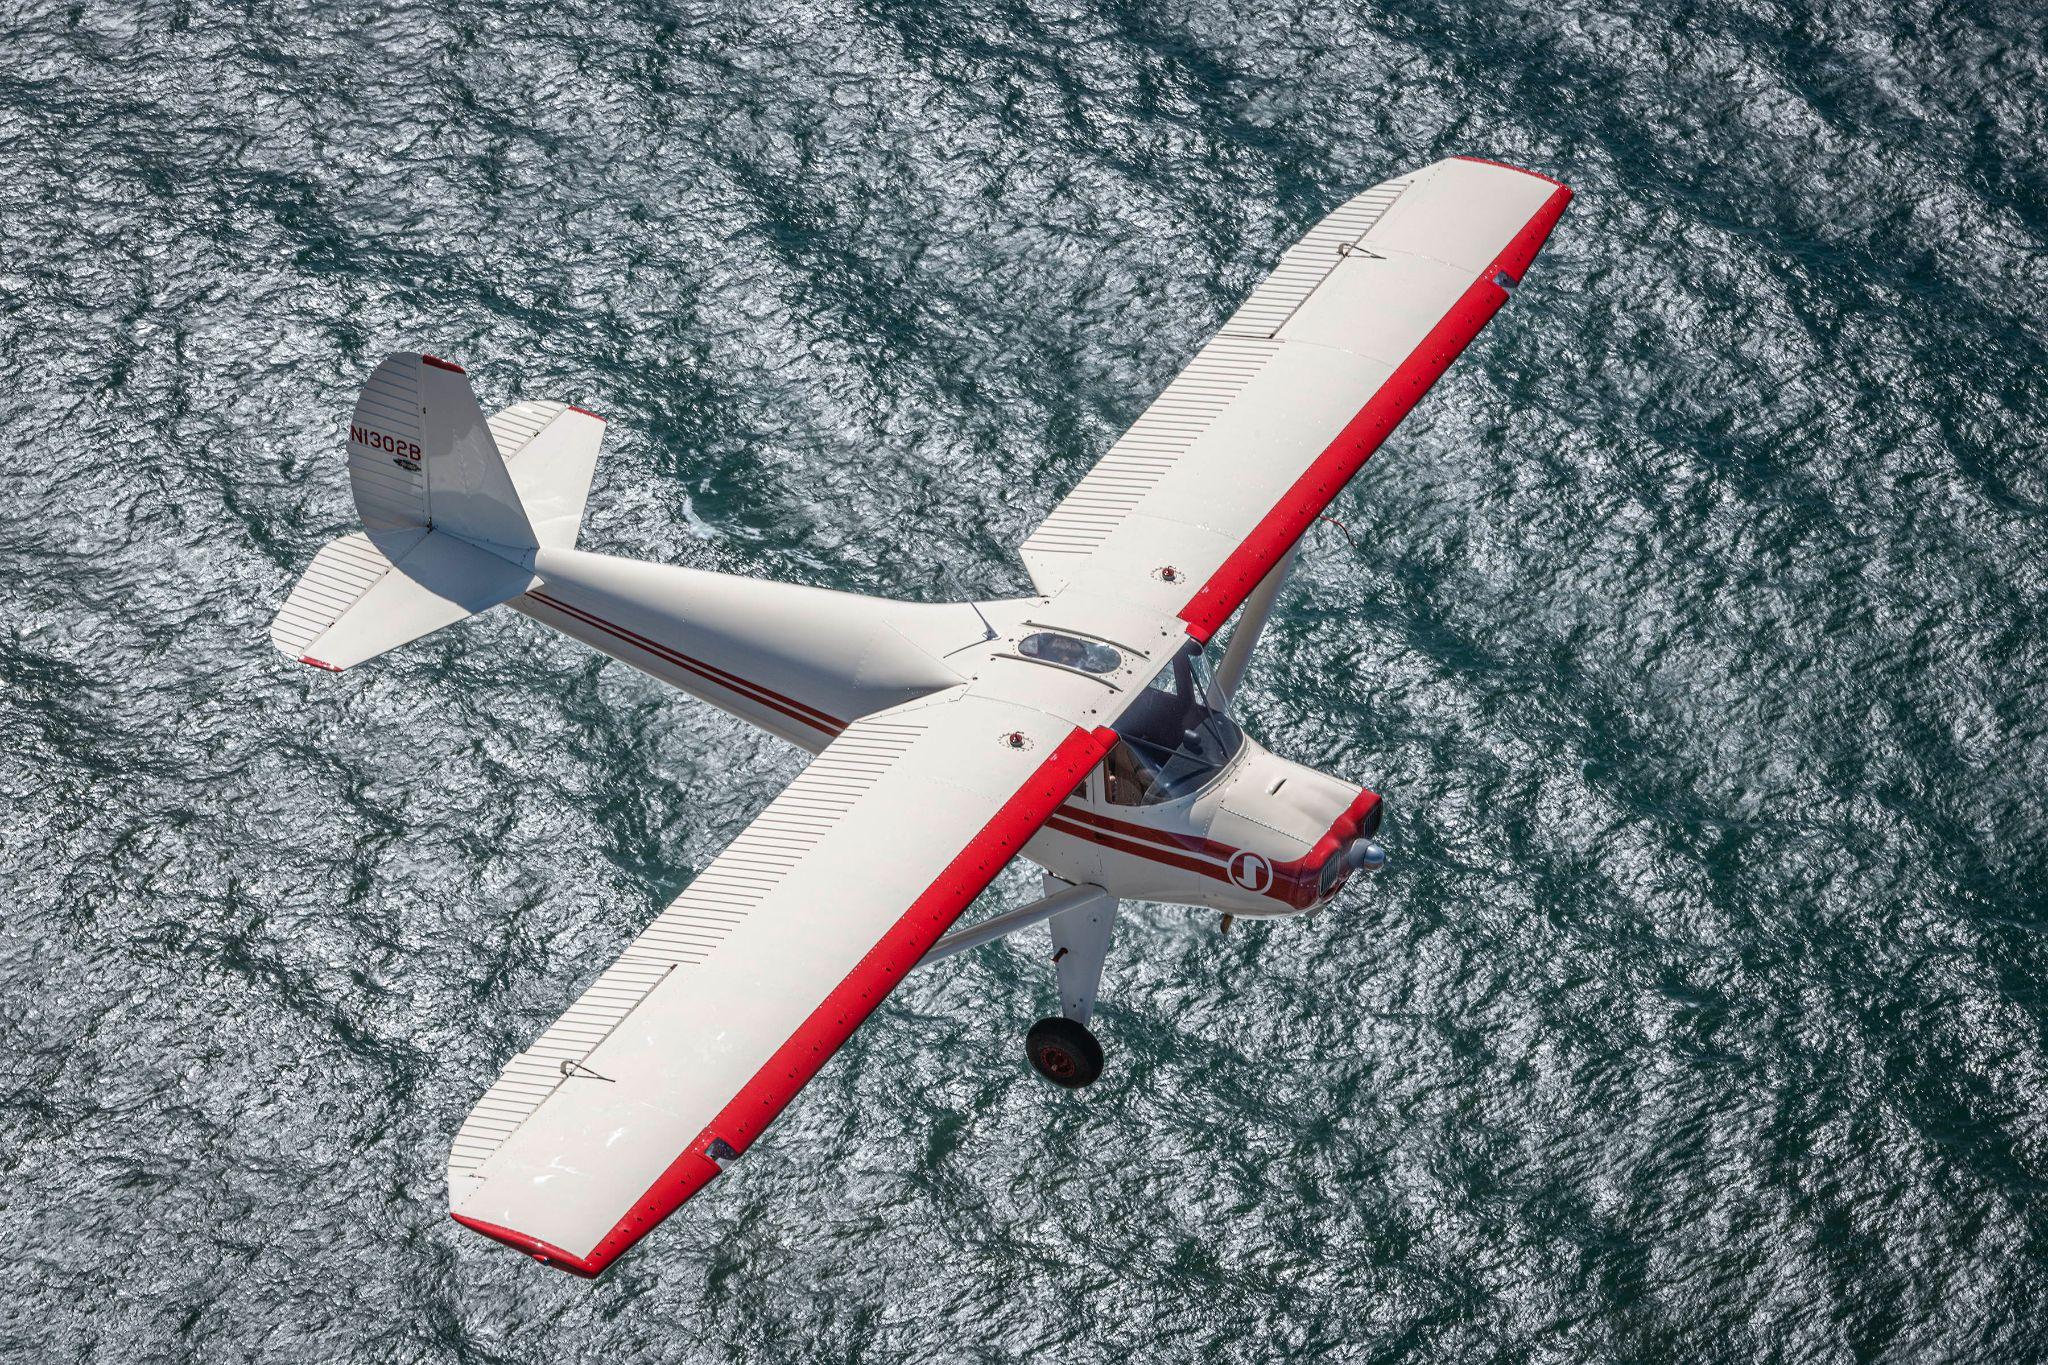
The Luscombe is a small airplane with a great deal of control authority, and pilots arriving from a Cessna or a Piper notice it in the first minute. That authority is what produces what we call Luscombe soup: a new pilot moves the stick more than the airplane asked for, the airplane answers immediately, the pilot corrects the answer, and the flight path develops a wobble that belongs entirely to the pilot. The cure is a lighter grip and smaller inputs, and it arrives within an hour or two.
The Luscombe first flew in 1937 and was one of the earliest all-metal aircraft available on the general aviation market. It combines great strength and lightweight aluminum construction. By 1960, over 5,800 Luscombe 8 variants had been built. The design proved so popular that there have been recent attempts to introduce new-manufactured Luscombes to the marketplace.
"The Luscombe will force you to fly. Most times it doesn't even want to fly straight."
While the flight manual is basically a pamphlet, and the design is simple, this little aircraft can teach a pilot much about how to properly fly an airplane. We believe that when you can fly the mighty Luscombe well, you have a far better chance of avoiding the highest fatality type of accident in general aviation: loss of control.
"Is the Luscombe a difficult airplane to fly? Absolutely not. In reality, because it reacts so positively and has so much control authority, it is probably safer and eventually easier than many of its peer group. That however demands the pilot learn to control himself first and then the airplane."
North Aero operates the Deluxe Silvaire Model 8E, N1302B. Every figure below is read from a source that governs this airplane, and the source is named. All speeds are in miles per hour, which is what the airspeed indicator in this airplane is marked in. Distances assume sea level, hard turf, and gross weight unless otherwise noted.
AIRCRAFT.md in the program folder is canonical for every number in this chapter and holds the source, the page, and the date it was read for each one. Where a source has not been read, this chapter says so rather than filling the gap. A number without a source is an open item, not an estimate.
N1302B left the factory in 1948 with an 85 horsepower Continental C85 and now flies behind a 100 horsepower Continental O-200 installed under STC. The airframe limits, the weights, and the airspeeds still come from the Model 8E handbook and the weigh sheet. The engine limits do not, and the 1948 handbook's engine figures are superseded. Mixing the two is the error this chapter exists to prevent.
Owner's Handbook of Operation, Silvair Model 8E, specifications page.
Fuel capacity from the Owner's Handbook specifications page. The engine as installed is the owner's statement of 2026-08-17; the STC paperwork has not been read. The 100LL minimum is read from the O-200 section of the Luscombe SLSA-8 handbook, which is a different airplane and the closest published O-200 document North Aero holds. The 1948 handbook's 73 octane minimum belongs to the original C85 and is superseded.
The propeller fitted with the STC, the oil sump capacity of the installed engine, and its fuel consumption have not been read from the aircraft records. What closes them is the airframe and engine logbooks, the STC paperwork or Form 337, and the engine operator's manual for the installed variant. Until then, plan fuel and oil from the placards and the cockpit checklist in the airplane, not from this page.
Weight and balance for N1302B dated 11-13-2007, prepared by Brandon Wills A&P I/A, and the loading worksheet derived from it. Baggage capacity and the 1400 lb gross are also on the Owner's Handbook specifications page.
Read that block twice, because it is the one that decides whether a lesson is legal. N1302B weighs 937 lb empty against a 1400 lb maximum gross, giving 463 lb of useful load. Full fuel is 30 gallons and full fuel is 180 lb. That leaves 283 lb for both occupants and baggage together, which is why most dual lessons launch with partial fuel rather than full tanks.
It is also why North Aero publishes a student weight limit of 220 lb for dual instruction in this airplane with a standard instructor, and publishes it before you book rather than discovering it with you at the airplane.
The 2007 weigh sheet gives arms without stating where they are measured from, and the type certificate that carries the datum has not been pulled. The arms above can be used with the CG range above, because they share a datum. They cannot be used to compute anything from a measurement you take on the airplane yourself.
Owner's Handbook of Operation, specifications page and performance information. The never exceed speed is in Appendix A with the rest of the speeds.
Every performance figure on that list was computed for the 85 horsepower engine the airplane left the factory with in 1948. With 100 horsepower installed, the take-off and climb figures are conservative and the airplane will do better than the book. They are printed as they were read and are not adjusted, because an adjusted figure is an invented one.
For each 1,000 feet of altitude above sea level, add 3 percent to the take-off and landing run. At Salinas (KSNS, elevation 85 ft) the correction rounds to nothing. The handbook calls the correction arbitrary for normal conditions in its own words, and it is printed here the way it is printed there.
The engine limits for N1302B are governed by the STC and by the engine operator's manual for the installed O-200 variant. Neither has been read. Until they are, this manual publishes no engine limit as this airplane's limit, and the ground briefing teaches the markings on the airplane's own tachometer and oil gauges. Those markings are certificated and count as placards, which makes them the most direct source this airframe has.
The figures below are read from the O-200 section of the Luscombe SLSA-8 handbook. That is a Light Sport airplane at a lower gross weight, and it is the closest published O-200 document North Aero holds. They are printed as background so that you know roughly what an O-200 wants, and they are not this airplane's limits. Where the instrument in front of you disagrees with this page, the instrument wins.
| Parameter | SLSA-8 handbook, O-200-D | Standing |
|---|---|---|
| Maximum continuous rpm | 2750 | Reference |
| Recommended cruising rpm | 2500 | Reference |
| Tachometer green arc | 450 to 2750 | Reference |
| Oil pressure, normal | 30 to 60 psi | Reference |
| Oil pressure, minimum at idle | 10 psi | Reference |
| Oil pressure, maximum cold | 100 psi | Reference |
| Oil temperature, normal | 75 to 220 F | Reference |
| Oil temperature, maximum | 240 F | Reference |
Pilot Operating Handbook, Luscombe Silvaire SLSA-8, Continental O-200-D, March 2012 Revision 0, sections 2 and 9. A different airplane. Its weights, its airframe limitations, and its performance figures are never used for N1302B.
The original handbook gives a red line, a cruise setting, an idle speed, an oil pressure band, and an oil temperature maximum, and every one of them was measured on the 85 horsepower engine the airplane left the factory with. They are superseded and are not reprinted here. Earlier revisions of this manual carried them as if they were current, which is the specific mistake this section now exists to prevent.
The Deluxe Silvaire is an all-metal two-place high wing monoplane. The wings are all-metal, with stressed skin and a single strut. The engine is a four-cylinder horizontally opposed air-cooled Continental O-200, carburetted, with dual ignition, a self-starter, and a primer. The 1948 handbook describes the original C85 installation and a generator for 12-volt operation. Whether N1302B carries a generator or an alternator today is an open item, and the equipment list settles it.
Dual stick-type controls are provided. The control stick on the right side is removable for passenger comfort. The airplane responds crisply to control inputs. New pilots should expect the controls to feel much lighter and more responsive than a typical Cessna or Piper trainer.
The wide-tread Silvaire landing gear is equipped with a hydraulic oleo and a coil steel spring providing easy ground maneuvering. A steerable full-swivel tail wheel provides additional ease while maneuvering on the ground. Positive action mechanical brakes control each wheel separately. Brakes are operated by depressing either or both of the heel pedals beneath the rudder pedals. The parking brake, operated by hand, is located under the left side of the instrument panel.
The fuel selector valve must be on either RIGHT TANK or LEFT TANK during all flight. There is no BOTH position. Fuel capacity is 30 gallons across two tanks. Direct-reading fuel quantity gauges sit above the cabin doors.
Capacity is not the same as what you can burn, and the usable quantity for this airplane has not been established from any source North Aero holds. The handbook does not state it. It says the figure is marked on the fuel selector valve placard and on the operations record form, and neither has been read. Earlier revisions of this manual printed one quantity in the prose and a much smaller one in the preflight checklist, which is how a document tells you it does not know. Read the placard in the airplane, and plan from that and from a dipped tank.
Endurance follows from the usable quantity and from the consumption of the installed engine, and both are open items. This manual publishes no endurance figure.
The 1948 handbook describes a 12-volt storage battery protected by thermal circuit breakers, supporting engine starting, radio, panel lighting, position lighting, and landing lights. What is installed in N1302B in 2026 is an open item pending the equipment list. What matters for flying it is in Chapter 6, and it is this: the magnetos are self-contained and are not fed by the electrical system, so losing the bus does not stop the engine.
The 1948 handbook shows the factory panel: oil pressure and oil temperature gauges, a tachometer, an ammeter, an airspeed indicator, an altimeter, and a compass, with two positions marked "space for additional instrument". No attitude indicator, no directional gyro, and no navigation receiver. The controls it labels are the ones you will reach for, and the ones worth finding before you first sit in the airplane are the magneto switch, the master switch, the parking brake, the fuel selector, the throttle, the primer, the mixture, and the carburetor heat.
That is the 1948 fit and not necessarily this airplane. The North Aero cockpit checklist references a turn coordinator, a transponder, and radios, and that checklist is a training aid rather than an equipment list. What is actually installed in N1302B is an open item. Your instructor will walk the panel with you in Lesson 1, which is the reading that closes it for you.
Before you get in the airplane, you need to understand what makes a tailwheel airplane behave the way it does. This chapter covers the aerodynamics and physics that will define every takeoff and landing you make.
In a tricycle gear airplane, the center of gravity sits ahead of the main landing gear. If the airplane starts to turn on the ground, the CG is already out in front, pulling the nose back to center like a shopping cart caster. The airplane is directionally stable on the ground. You can be a little lazy with your feet and get away with it.
In a tailwheel airplane, the center of gravity sits behind the main gear. If the airplane starts to turn, the CG is behind the pivot point, and momentum wants to keep it swinging. Instead of self-correcting, the turn accelerates. If left uncorrected, the tail swaps ends with the nose. That is a ground loop, and it can happen faster than most pilots expect.
That single difference, where the CG sits relative to the main gear, is the reason tailwheel airplanes demand more of a pilot on the ground. It is not that they are harder to fly. It is that they require you to fly them actively, all the time, from the moment the wheels start rolling until the moment they stop.
A ground loop is not just embarrassing. It can collapse the landing gear, fold a wing tip into the ground, or flip the airplane. Damage is often substantial. Prevention starts with understanding the physics covered in this chapter.
When a tailwheel airplane is rolling straight, everything is fine. The moment a yaw begins, the mass of the airplane behind the main gear acts like a pendulum. The heavier the airplane, the faster it is moving, and the farther the CG is behind the gear, the harder that pendulum swings.
Your job is to catch the swing before it builds. Directional control on the ground comes from three tools: rudder, tailwheel steering, and differential braking. At low speed the rudder is weak and you rely on the tailwheel and brakes. At high speed the rudder becomes effective but you have more momentum working against you. There is no speed where you can relax. That is the nature of the machine.
Every single-engine propeller airplane produces torque-related effects that try to yaw the airplane. In a tricycle gear airplane on the ground, these effects are manageable because the nosewheel provides directional stability. In a tailwheel airplane, you have to actively counteract all of them.
There are four torque-related effects you need to understand. Each one tries to yaw the airplane, and they can combine or offset each other depending on the phase of flight.
As the propeller spins, it imparts a rotational component to the air flowing aft. This spiraling slipstream wraps around the fuselage and strikes the left side of the vertical stabilizer, pushing the tail to the right and yawing the nose to the left. This effect is most pronounced at high power and low airspeed, which is exactly the takeoff.
When the airplane is in a nose-high attitude, the descending propeller blade (on the right side, looking from the cockpit) takes a bigger bite of air than the ascending blade on the left. This creates more thrust on the right side of the propeller disc, yawing the nose to the left. P-factor is strongest during the takeoff roll when the tail is down and the propeller disc is tilted, and during slow flight at high angles of attack.
Related to P-factor, this effect comes from the difference in relative wind hitting the ascending and descending blades when the airplane is not in level, wings-level flight. The result is an uneven distribution of thrust across the propeller disc. In practical terms, it adds to the left-yawing tendency during high angle of attack operations.
The spinning propeller acts as a gyroscope. When a force is applied to a gyroscope, the resulting movement occurs 90 degrees ahead in the direction of rotation. When you push the tail up during the takeoff roll (pitching the nose down), the precession effect yaws the nose to the left. When you raise the tail in a Luscombe during takeoff, you will feel this as a sudden left-turning tendency that requires right rudder to correct.
You do not need to calculate these forces. You need to recognize when they appear and respond with the correct rudder input. During takeoff, they all tend to yaw the nose left. The fix is right rudder, applied smoothly and progressively as power increases and the tail comes up. Anticipate, do not react.
Sitting on the ground in a tailwheel airplane, the nose is pointed up. In the Luscombe, the forward visibility over the nose during taxi is limited compared to a tricycle gear airplane. You will need to S-turn during taxi to clear the area ahead, especially on busy ramps and taxiways.
During the takeoff roll, the sight picture changes dramatically. As the tail comes up and the airplane transitions to a level attitude, the nose drops and you can suddenly see over it. This transition happens quickly and is one of the moments where new tailwheel pilots can get behind the airplane.
On approach and landing, the sight picture is also different from what you are used to. During a three-point landing, you are looking at the runway at a much steeper angle through the windscreen. The sight picture at the moment of touchdown will not look like what you see in a Cessna 172 or Piper Warrior. Trust your peripheral vision and your feel for the airplane. That skill will develop with practice.
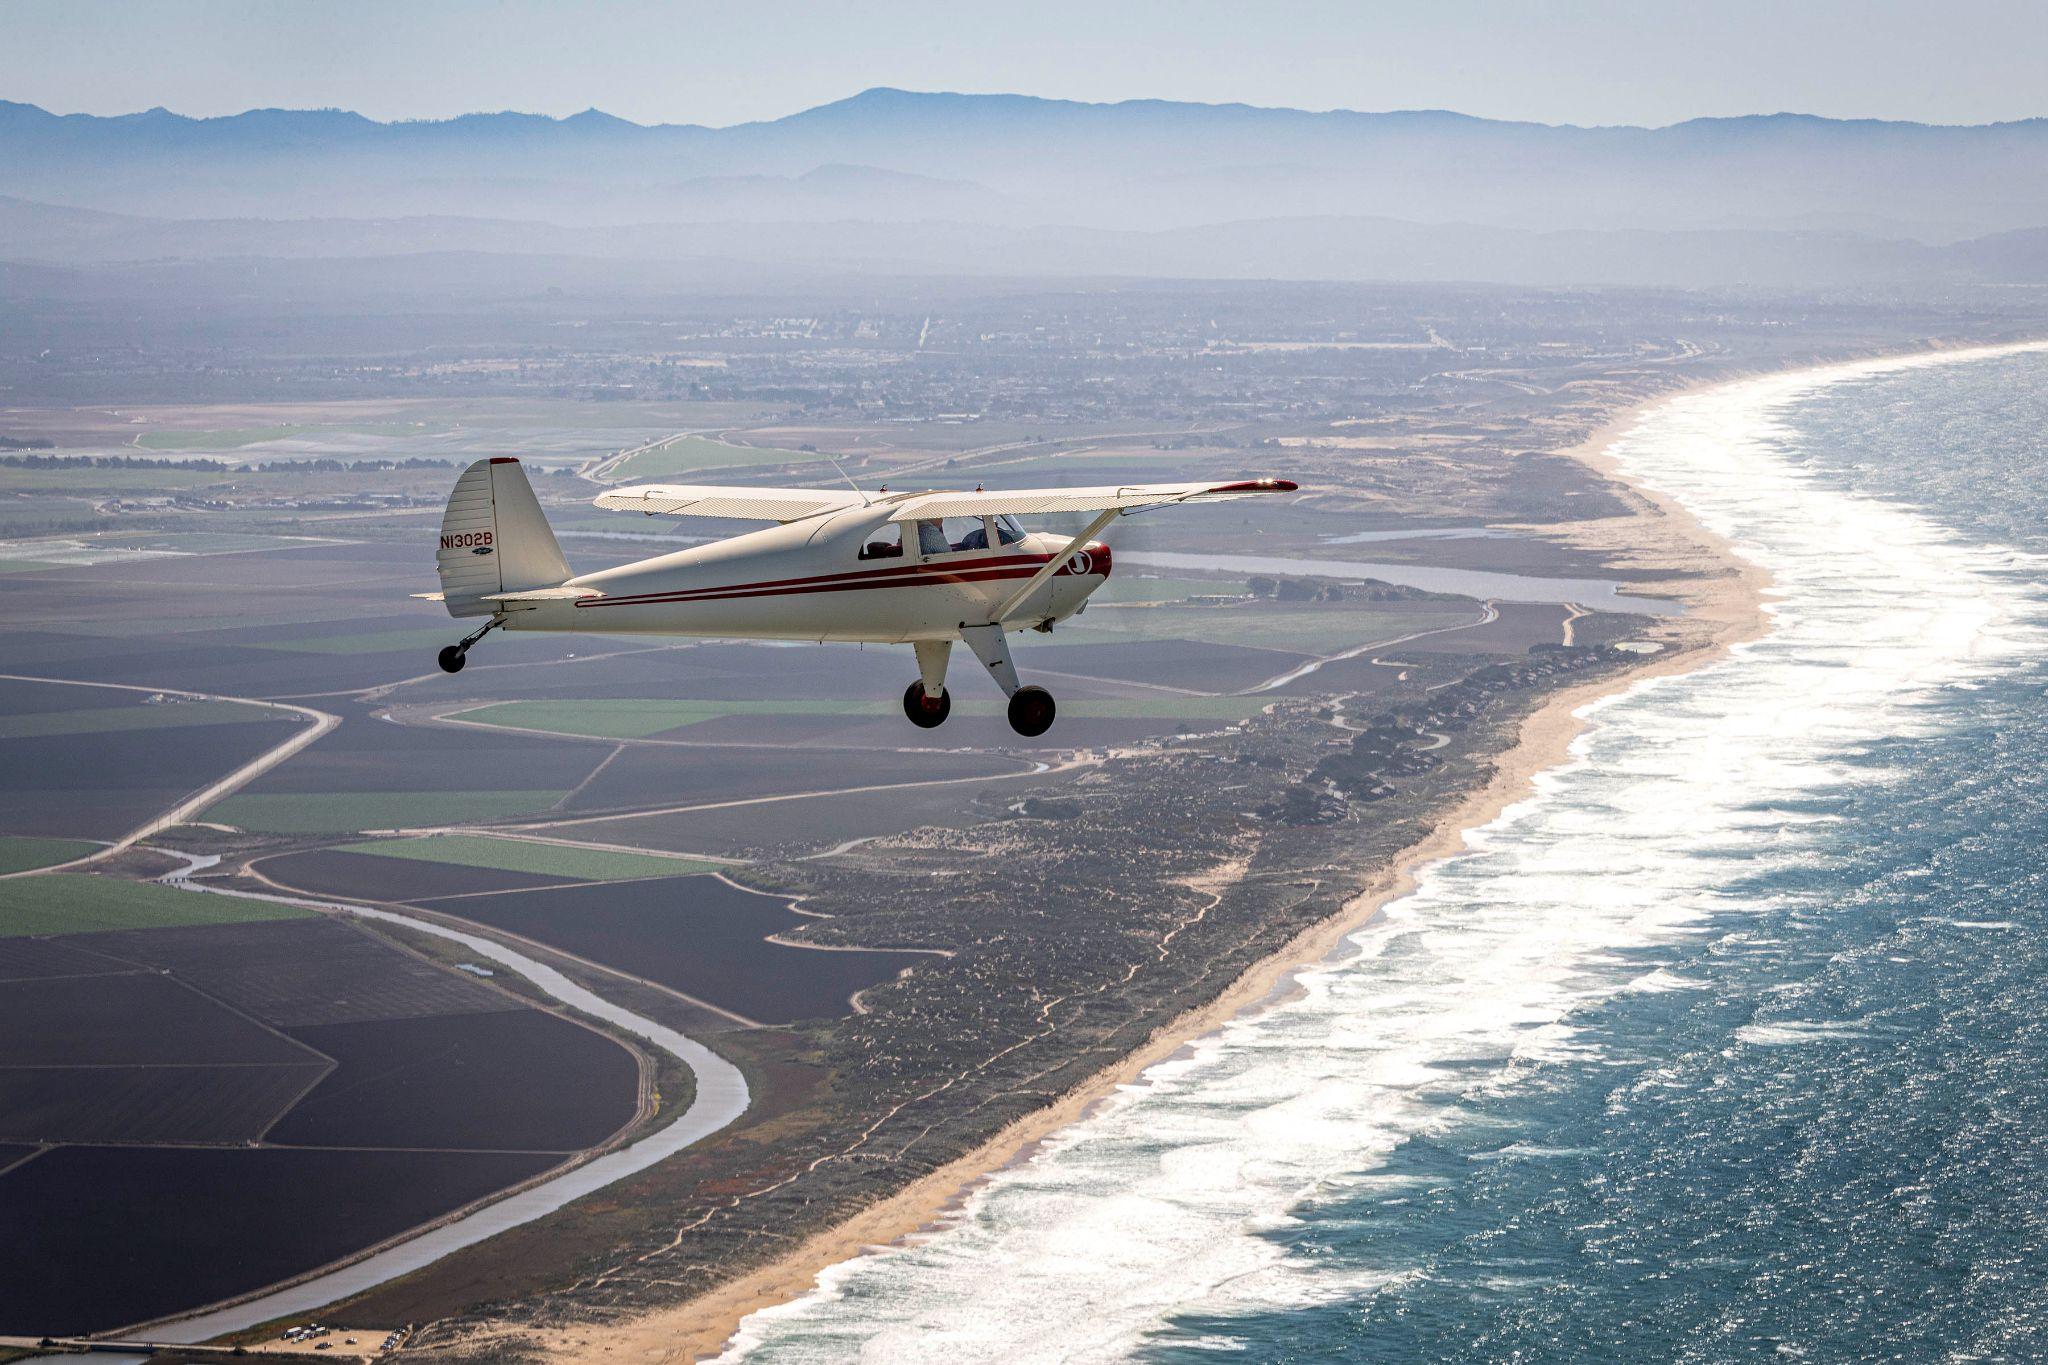
Most of your first hour in this airplane is spent going nowhere. You taxi, you weave, you find out how quickly it wanders when your feet stop working, and you do that until the correction starts before you have finished noticing the problem. Everything after that depends on it. Phase 1 covers the ground work, the preflight, the taxi, the takeoff, and the air work, and it closes when you can brief the ground material and fly the airplane.
It is important that you understand what is happening to the aerodynamics of the aircraft during takeoff and landing, which includes understanding how the propeller and torque can cause the aircraft to yaw. If you have not read Chapter 2, go back and read it now. The concepts covered there will show up on every flight you make.
The preflight on a tailwheel airplane shares much in common with what you already know, but there are several items specific to the Luscombe and conventional gear aircraft that require extra attention.
The main landing gear on the Luscombe uses a hydraulic oleo strut and coil spring. Check that the struts are not leaking fluid and that they are supporting the aircraft evenly. Look at the tires for wear, proper inflation, and flat spots. Flat spots can develop if the airplane has been parked with the brakes set in hot weather.
The tailwheel is a full-swivel type. It should rotate freely through its full range of motion. Check the tailwheel tire for wear and proper inflation. Inspect the springs and cables that connect the tailwheel to the rudder. These should be tight with no visible fraying or slack. A sloppy tailwheel makes ground handling much harder than it needs to be.
The Luscombe has two fuel tanks, one in each wing root. The fuel selector must be on either RIGHT TANK or LEFT TANK during all flight. There is no "both" position. The fuel quantity gauges are direct-reading sight gauges located above the cabin doors. Verify fuel quantity visually during preflight. Do not rely on the gauges alone. Drain fuel from the gascolator and check for water and debris. The usable quantity is an open item, so what you have is what you dipped and what the placard on the selector valve says, not a number from this manual.
Check all control surfaces for freedom of movement and proper security. The Luscombe uses stick-type controls, which gives you a direct mechanical connection to the ailerons and elevator. Move the stick through its full range and verify the correct surfaces move in the correct direction. Check the rudder pedals for full travel and verify rudder deflection.
The Continental O-200 is a simple, reliable engine, and the airplane wears it well. Check the oil level against the dipstick markings and the placard, not against a figure in this manual: the quantities in the 1948 handbook are for the original engine's sump and are superseded, and the installed engine's capacity is an open item. Inspect the cowling for security, check the exhaust stack, and look for oil leaks and fuel staining.
North Aero does not permit hand-propping. N1302B is started on the starter, and no North Aero student, member, or renter hand-props it. That is a school policy and it is not negotiable on the day. It still leaves you one habit to carry for life: treat the propeller as though the magnetos are hot, every time, including when the master switch is off. A single blade can kill you.
Starting this engine is a short sequence with two items in it that a pilot coming from a newer trainer will not have met: a primer, and a fuel selector with no BOTH position. The sequence is in Appendix B and it is not restated here, because a manual that gives a checklist twice eventually gives it two different ways. Appendix B is the study copy. The checklist in the airplane is the one you run.
Before starting, make sure the area around the propeller is clear. Call "CLEAR PROP" loudly and wait for an answer or for the visual confirmation that nobody is near the airplane.
Once it is running, check oil pressure immediately. If it does not register within thirty seconds, shut down. Warm the engine at the fast idle setting the cockpit checklist gives before you taxi, and watch the oil temperature come off its stop rather than watching the clock.
An over-primed engine puts raw fuel where a fire starts. Prime conservatively, and know the fire on start memory item in Appendix A before you touch the starter for the first time. The short version is that you keep cranking.
Taxiing a tailwheel airplane is the first skill you will notice is fundamentally different from a tricycle gear airplane. In a nosewheel airplane, you steer with your feet and the airplane more or less goes where you point it. In a tailwheel airplane, you are managing a machine that does not want to go straight.
Hold the stick full aft during taxi. This puts weight on the tailwheel and improves directional control. It also prevents the propeller wash from lifting the tail, which would reduce the effectiveness of the tailwheel steering. The only exception is taxiing in a strong tailwind, where you would hold the stick forward to prevent the wind from lifting the tail.
Position the ailerons into the wind, just as you would in any airplane. In a crosswind from the left, turn the stick to the left (ailerons into the wind). In a tailwind quartering from the left, push the stick forward and to the right (dive away from the wind). This is the same wind correction you learned for tricycle gear, but it matters more here because the airplane is lighter and more susceptible to being weathervaned.
Your feet are your primary directional control on the ground. The tailwheel is connected to the rudder, so rudder pedal inputs steer the tailwheel. At low taxi speeds, you will use a combination of rudder and differential braking to maintain direction. Keep your inputs smooth and anticipate corrections rather than reacting to them.
Use brakes sparingly. The heel-operated mechanical brakes on the Luscombe are effective but aggressive braking can nose the airplane over, lock up a tire, or create a ground loop situation. Brakes are a tool for fine-tuning your direction, not for steering. If you find yourself relying heavily on brakes to taxi straight, you are going too fast.
Taxi at the slowest speed that allows you to maintain directional control. In a Luscombe, that is usually idle or just above idle power. If you need a burst of power to get rolling, bring it back to idle as soon as you are moving. The lighter the airplane, the faster it accelerates, and speed is the enemy of directional control during taxi.
Maximize tire tread life by making wide turns when possible. Tight, sharp turns scrub the tires and wear them unevenly. The tires on a Luscombe are small and not cheap to replace. Plan your taxi route to minimize tight turns.
The nose-high attitude of the Luscombe on the ground means you cannot see directly ahead during taxi. You must S-turn: gently weave left and right so you can look around the cowling and clear the area in front of you. This is not optional. It is standard procedure for any tailwheel airplane on the ground. Get in the habit from your first taxi.
Before you fly the airplane, you may practice high-speed taxi runs on the runway. This exercise builds your feel for the rudder and tailwheel at higher speeds and helps you experience the transition as the tail comes light. Your instructor will demonstrate the correct technique.
During a high-speed taxi, the tail will begin to get light as airspeed increases. At this point, the tailwheel becomes less effective for steering and the rudder takes over as your primary directional control. This transition zone is where many new tailwheel pilots get surprised. The airplane can feel unpredictable as one control fades and the other takes over. Smooth, progressive rudder inputs are essential.
The takeoff in a tailwheel airplane is where everything you read in Chapter 2 comes together. All four torque effects are working on the airplane, the CG is behind the main gear, and the airplane transitions through the most critical phase of ground handling in a matter of seconds.
Line up on the centerline and smoothly apply full power. As power comes in, the airplane will want to yaw left. Apply right rudder to keep the nose tracking straight down the runway. The amount of right rudder required will change as the airplane accelerates.
As the airplane accelerates, the tail will become light and begin to rise on its own. You can assist this with a slight forward stick movement. As the tail comes up, you will experience a noticeable left-yaw from gyroscopic precession. Anticipate this and have right rudder ready. Once the tail is up and the airplane is in a level attitude, you will suddenly be able to see over the nose. Hold this attitude and let the airplane accelerate to flying speed.
The airplane will fly itself off the runway when it is ready. Do not try to force it into the air early. Once airborne, maintain your heading and establish a climb at 72 MPH for best rate of climb.
If the airplane starts to swerve during the takeoff roll and you cannot correct it, close the throttle and stop. Do not try to salvage a bad takeoff. There is always time to taxi back and try again. There is not always time to recover from a ground loop at takeoff speed.
Once in the air, the Luscombe flies like any other single-engine airplane, only more responsively. The control forces are light and the airplane reacts quickly to inputs. New students tend to overcontrol, which is where the term "Luscombe soup" comes from. Relax your grip, use small inputs, and let the airplane do the work.
During Phase 1 flight lessons, you will practice the following maneuvers. The goal is not to master them in the Luscombe but to develop a feel for how the airplane responds compared to what you already know.
The Luscombe rolls into and out of turns crisply. In steep turns, you will notice the airplane requires less back pressure than a heavier trainer. Be careful not to over-bank. It will roll past your target bank quickly if you are heavy-handed with the stick.
The Luscombe stalls at 48 MPH indicated. The stall is relatively gentle but the airplane will drop a wing if the ball is not centered. Practice both approach (power-off) and departure (power-on) stalls. In power-on stalls, the left-turning tendency is pronounced and requires significant right rudder.
Slow flight in the Luscombe gives you a preview of what the airplane will feel like in the landing configuration. The controls get mushy, the airplane requires more rudder to stay coordinated, and you will feel the airplane buffet as it approaches the stall. Spend time here. The feel you develop in slow flight translates directly to the flare during landing.
The Luscombe has no flaps. Altitude management on approach is done with slips. You need to be comfortable with forward slips to lose altitude without increasing airspeed. Practice them at altitude first until the cross-controlled feel becomes natural.
No flaps means slips are essential
Unlike most modern trainers, the Luscombe does not have flaps. Your only tools for steepening the approach without adding speed are slips and power management. If you are high on approach, you slip. If you are low, you add power. Learn the slip early, because you will use it on every approach.
Turns around a point, S-turns across a road, and rectangular patterns. These reinforce wind correction and coordination. In the Luscombe, they also build your comfort with the light, responsive controls at low altitude.
During Phase 1, your instructor will demonstrate the approach and landing. Your job is to observe the sight picture, the energy management (remember, no flaps), the use of slips on approach, and the flare and touchdown. Pay attention to what the instructor does with the stick and rudder during the rollout after touchdown. The landing is not over when the wheels touch. It is over when the airplane is stopped or at a safe taxi speed. Chapter 4 covers landing techniques in detail.
Review the transfer of control procedures with your instructor before every flight. Be absolutely clear about who has the controls at all times. In a tailwheel airplane, a moment of confusion about who is flying during a critical phase can have immediate consequences. The standard call is "I have the controls" / "You have the controls," confirmed verbally before any exchange.
A landing in this airplane happens in about a second, and there is more going on inside that second than you can attend to at first. Phase 2 is where you take the landing over from your instructor. Be patient with each element. The work is slowing your own mind down enough to feel where the airplane is, and that arrives later than the technique does.
For now we are going to keep things in calm winds, or winds straight down the runway. In Phase 3 you will ratchet up the skills learned here by dealing with crosswinds.
Even during calm conditions, the airplane wants to swap ends. Do not forget that. Be in agreement with your instructor about who is in control of the aircraft and when. The transfer of control procedure is not a formality. It is a safety requirement.
Every good landing starts with a stabilized approach. North Aero publishes no approach speed for this airplane, and that is a gap rather than a philosophy: no source North Aero holds states one, and a number invented for a manual is worse than no number at all. Your instructor will give you a target on the day and you will learn to fly it to the sight picture and the feel of the controls rather than to a figure. Because you have no flaps, you manage the glidepath with power and slips.
Fly a standard traffic pattern. On downwind, reduce power and begin your descent abeam the touchdown point. Turn base when appropriate for the conditions, and roll out on final with the runway made. If you are high, slip. If you are low, add power. The goal is to arrive over the threshold at the right speed and altitude, with the power coming to idle as you cross the numbers.
The three-point landing is the full-stall landing. All three wheels, the two mains and the tailwheel, touch the runway at the same time. This is the classic tailwheel landing and the one you will learn first.
Cross the threshold at approach speed with power at idle. As you enter the flare, begin to progressively bring the stick back. You are looking for the same feel you get in a power-off stall: the nose comes up, the airplane decelerates, and it settles onto the runway just as it runs out of flying speed. At the moment of touchdown, the stick should be full aft.
The sight picture in the flare is different from what you are used to. You cannot see the runway directly over the nose at this point. Use your peripheral vision, and look down the left side of the cowling at the runway edge. Judge your height and rate of descent from there. This takes practice, and it will feel uncomfortable at first. Trust the process.
At the moment of touchdown and through the entire rollout, the stick must be full aft. This is not a suggestion. It is a rule. Full aft stick puts weight on the tailwheel, which improves directional control. It also keeps the angle of attack high, which keeps the airplane from bouncing. If you let the stick drift forward at touchdown, the airplane will bounce, the tailwheel will come off the ground, and you will lose your best tool for directional control at the worst possible moment.
Stick back. Always.
From the moment the wheels touch until the airplane is stopped or at a safe taxi speed, the stick should be full aft. Make this a reflex. It is the single most important habit in tailwheel landing technique.
The technique is the same as a normal three-point landing, but you will fly a steeper approach (using slips as needed) and touch down at the lowest possible speed right at your aiming point. After touchdown, apply brakes firmly but progressively. Remember that aggressive braking on the mains with the tail in the air risks nosing over.
On a soft field, your goal is to touch down as gently as you can and keep the airplane rolling. Everything you were taught about holding weight off the nosewheel has nowhere to go here, because there is no nosewheel, and the soft field technique turns out to be the more natural one in this airplane. The three-point attitude already has it at a high angle of attack. Touch down softly, hold the stick full aft, keep rolling, and leave the brakes alone unless you need to stop.
The wheel landing is the opposite of a three-point landing. Instead of a full-stall touchdown, you fly the airplane onto the runway on the two main wheels only, with the tail up. The airplane touches down at a higher speed in a more level attitude.
Wheel landings offer several advantages in specific situations. The airplane touches down at a lower angle of attack, which gives you better forward visibility at the moment of touchdown. The level attitude provides better crosswind handling because you can keep the upwind wing lower without dragging the tail. And in gusty conditions, the higher touchdown speed gives you more control authority from the rudder and ailerons.
Wheel landings are also preferred at night, where the flatter attitude gives better sight of the runway, and in conditions where airframe icing is a concern, where the higher approach speed keeps a margin above a stall speed that ice has raised. Neither is something you will meet in this program. Night in N1302B sits behind a separate Night Checkout taken after the endorsement, and it is named here so that you know the technique has a use beyond the one you are learning it for.
Fly the approach at normal approach speed. As you enter the flare, level off just above the runway in a slightly nose-low attitude. The airplane should be flying level, a foot or two above the surface. As the mains touch, apply a slight forward pressure on the stick to pin the wheels to the runway. This is the critical moment that differs from a three-point landing: instead of pulling back, you push forward just enough to keep the mains firmly on the ground.
As the airplane decelerates, the tail will settle on its own. Do not force it down. Let airspeed bleed off naturally. As the tail touches, transition to the full-aft-stick technique you use for three-point landings.
High rate of descent. The airplane should be flown onto the runway, not dropped onto it. If you feel a firm impact on the mains, you are descending too fast in the flare. Level off lower and let the airplane settle.
High airspeed. Excess speed means the airplane wants to fly, not land. You will float down the runway burning up your available landing distance. Be patient on the approach and let the speed stabilize before you commit to the flare.
Diving at the runway. This happens when a pilot gets impatient and pushes the nose down to get to the runway. The airplane will touch down fast, bounce, and the situation deteriorates from there. Fly the airplane to the runway, do not push it.
Tail low at touchdown. If the tail is dropping as the mains touch, you are not in a wheel landing. You are in a botched three-point landing. The airplane will bounce because it is touching down at the wrong attitude and speed for either technique. Commit to one landing type or the other.
Failure to apply forward stick at touchdown. If the mains touch and you do not pin them with a slight forward pressure, the airplane will bounce back into the air. At this point you are low, slow, and behind the airplane. Pin the wheels and hold them.
Bounces happen. They happen to new students and they happen to experienced tailwheel pilots. What matters is how you respond.
Small bounce (a foot or less): If the bounce is small and the airplane is still in a normal landing attitude, hold your position and let the airplane settle back to the runway. Keep the stick where it was and let the airplane land itself.
Large bounce (more than a couple of feet): Go around. Apply full power, establish a climb, and set up for another approach. Do not try to save it. A second bounce is almost always worse than the first, and each successive bounce gets more unpredictable. The safest response to a big bounce is to go around and try again.
Never try to force the airplane back onto the runway after a significant bounce. The instinct is to push the nose down to get back to the runway. This drives the airplane into the ground at a high rate of descent and a poor attitude. The result is usually a harder bounce, a collapsed gear leg, or a prop strike. Go around.
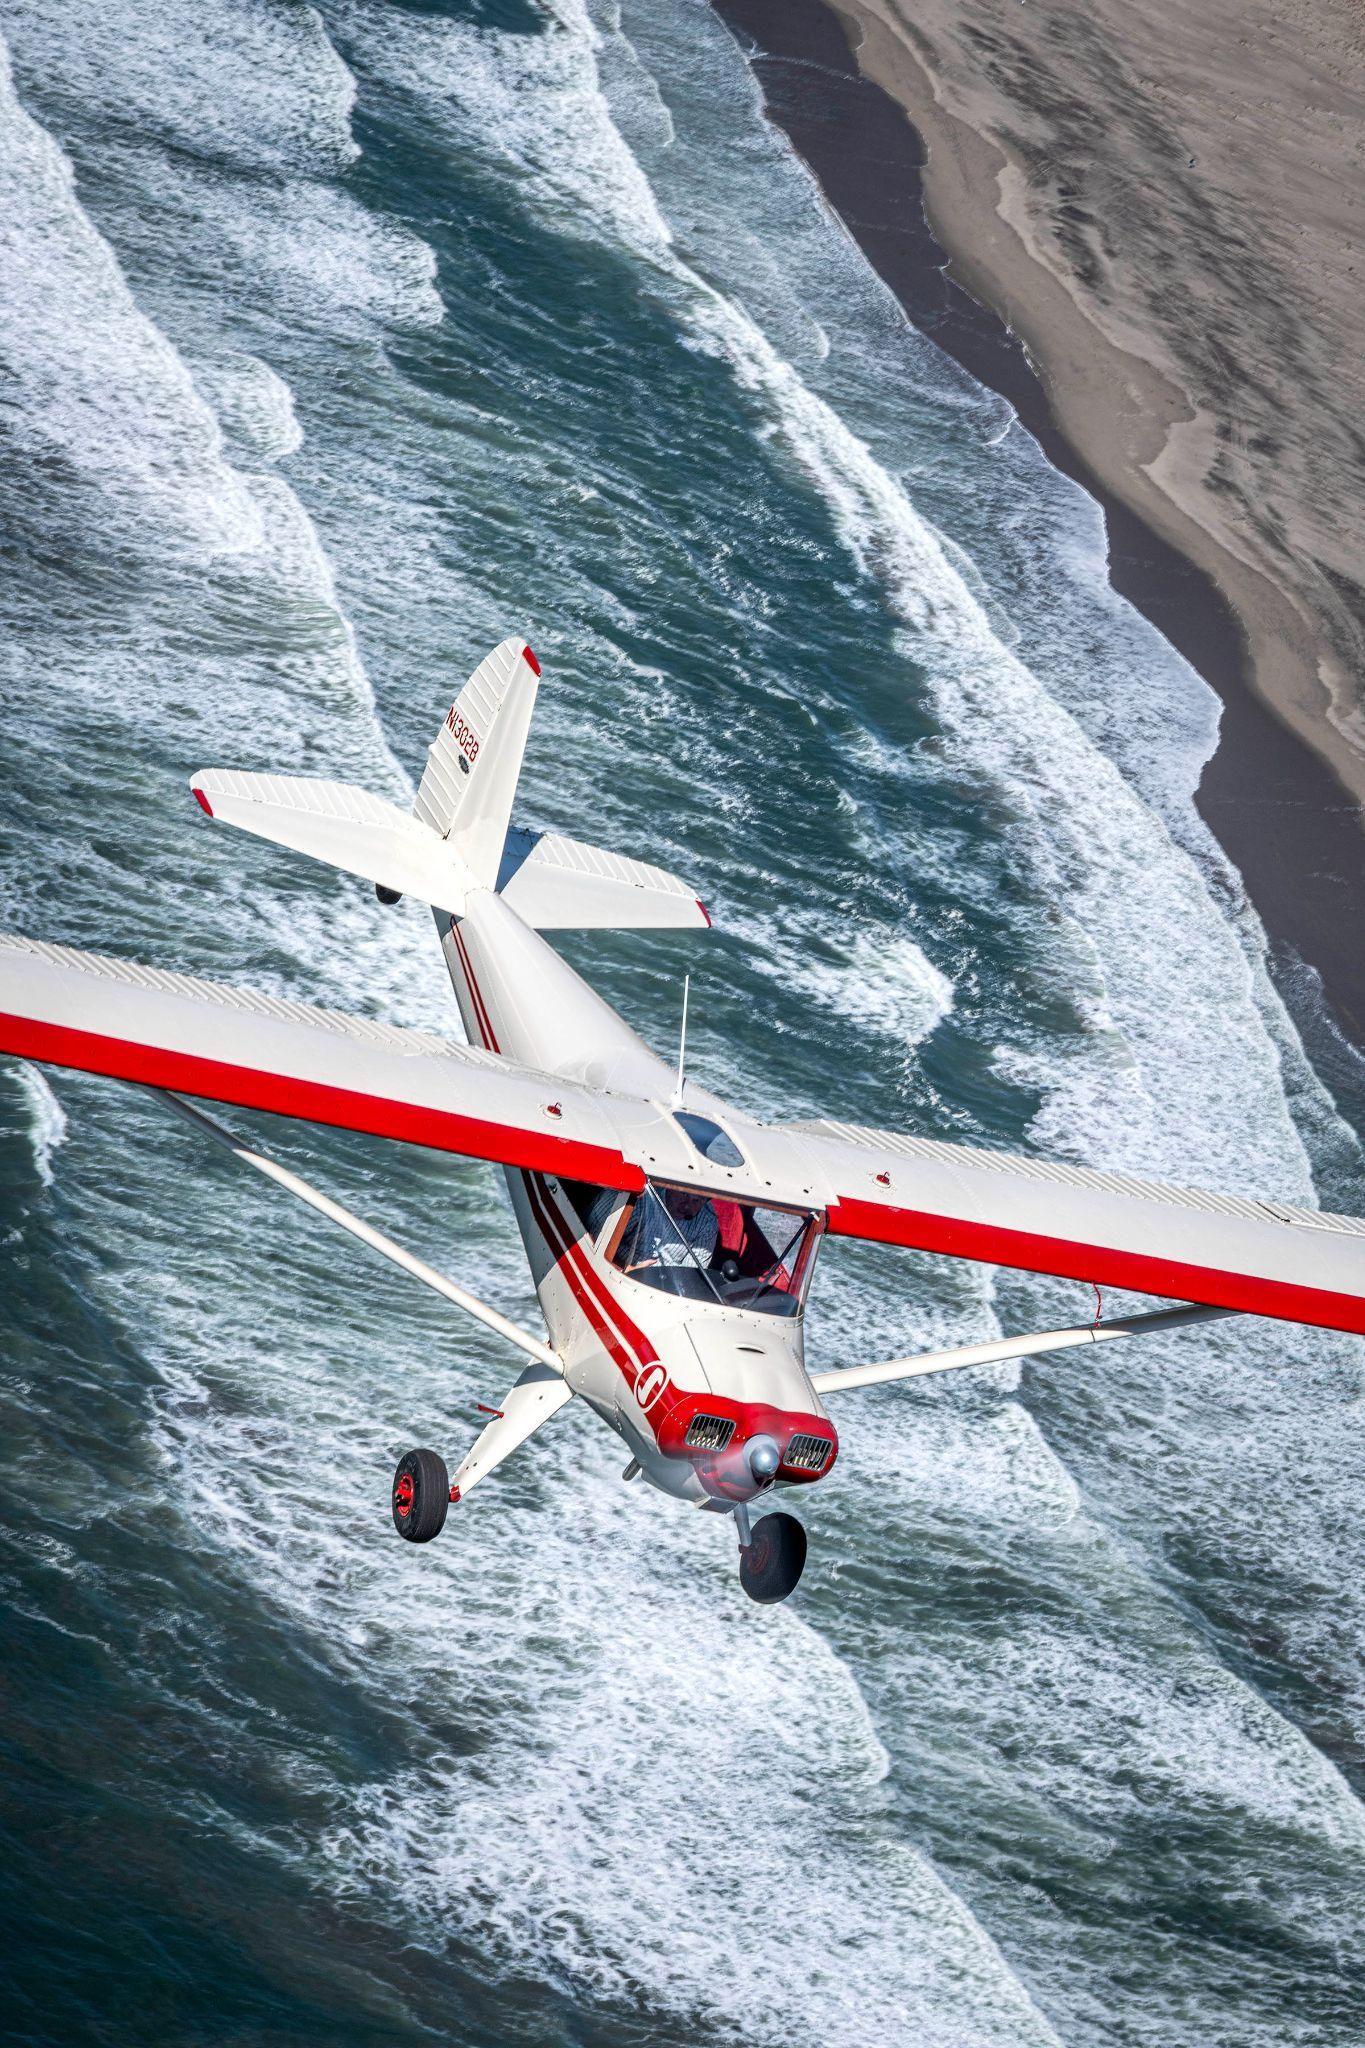
A crosswind is the condition that turns a landing you would have walked away from into one the insurance company hears about. Phase 3 is where you learn to fly in it. Review the transfer of control procedure before every flight in this phase.
These two lessons are where you learn to identify what a crosswind is doing to the airplane and to respond to it before it responds for you. Phase 3 is also where the endorsement decision gets made, on the six regulatory elements standing at proficient.
The endorsement is not by itself permission to take N1302B out alone. That needs Club membership and a Checkout, which is North Aero's own determination that you can operate this airframe at this field to this school's procedures. For a student finishing Lesson 5 the Checkout is a form and a conversation in the same session. Appendix C has the rest of it.
Any amount of crosswind, if ignored and not compensated for, can result in a catastrophe.
Before you can deal with the crosswind, you have to know what it is. Use every available source of information to determine wind direction and velocity before you commit to a takeoff or landing.
ATIS / AWOS: The automated weather at KSNS gives you a reported wind direction and speed. This is your starting point, but it is measured at a specific location on the field and may not represent exactly what you will encounter on the runway.
Windsock: The windsock is your best real-time indicator. It shows you what the wind is doing right now, right at the airport. A fully extended sock indicates roughly 15 knots or more. Learn to read it for both direction and approximate velocity.
Crab angle: If you are on final and holding a crab to stay aligned with the runway, you have a crosswind. The bigger the crab, the stronger the crosswind.
Drift: On downwind and base, notice which way the airplane drifts. This tells you wind direction at pattern altitude.
Smoke and dust: Look for smoke, dust, flags, or ripples on water. These show you surface wind direction and relative strength.
The handbook states no maximum demonstrated crosswind component, which is ordinary for an airplane certificated in this era. That is a complete answer rather than a missing one, and you should be suspicious of any figure you find quoted for a Luscombe 8E, because the one in general circulation belongs to a different airplane.
What binds you is a North Aero operating limit instead: a crosswind component of 10 knots for solo flight. It is a school limit, it stands on its own, and it does not depend on any handbook figure. Your own personal minimum starts lower than that and moves as you demonstrate the skill, which is Chapter 7.
A crosswind takeoff in a tailwheel airplane requires more attention than in a nosewheel airplane because the CG behind the main gear makes the airplane want to weathervane into the wind.
Line up on the centerline. Position the ailerons into the wind (stick toward the wind). Apply power smoothly and use rudder to maintain centerline. As the airplane accelerates, the rudder becomes more effective, but the crosswind also has more effect on the airplane.
Keep the windward wing slightly low with aileron. The amount of aileron will decrease as you gain speed, because the ailerons become more effective. The takeoff roll will be longer than in calm conditions because the lowered wing reduces total lift slightly.
When the airplane lifts off, it will want to drift with the wind. Establish a crab angle immediately to maintain your ground track. Do not hold wing-down after liftoff. Transition to a crab and fly the airplane normally.
The crosswind landing in a tailwheel airplane is the most demanding skill you will learn in this course. It requires precise coordination of all three controls simultaneously at a moment when the airplane is slow and close to the ground.
This is the primary crosswind landing technique you will use. It works for both three-point and wheel landings.
On final approach, lower the windward wing and apply opposite rudder to keep the nose aligned with the runway. You are in a cross-controlled state: aileron toward the wind, rudder away from the wind. The amount of bank and rudder depends on the crosswind component. More wind, more bank, more rudder.
The goal is to touch down on the upwind main wheel first. In a three-point crosswind landing, the upwind main touches, then the downwind main, then the tailwheel. In a wheel landing, the upwind main touches first, followed by the downwind main. Either way, the upwind wheel touches first.
After touchdown, continue to hold the wing into the wind. As the airplane decelerates, you will need increasing aileron into the wind because the ailerons become less effective at lower speeds. Full aft stick, full aileron into the wind, and active rudder to maintain centerline. The landing is not over until you are at taxi speed.
If the airplane touches down while drifting sideways, the side load on the landing gear can start a ground loop. The gear is not designed for lateral loads. A drift at touchdown combined with the aft CG creates a pivot point, and the tail swings around. This is the most common cause of crosswind ground loops, and it is almost entirely preventable. If you are not aligned with the runway at the moment of touchdown, go around.
Releasing the wing-down too early. You must hold the crosswind correction through the flare, touchdown, and rollout. The moment you level the wings, the wind pushes you sideways.
Not enough rudder. If the nose is not aligned with the runway at touchdown, you will touch down in a crab. The side load will start a ground loop before you can react.
Fixating on the landing. In a strong crosswind, if the landing does not feel right on short final, go around. It is always the right call. Landing in a crosswind that exceeds your skill level or the airplane's capabilities is one of the fastest ways to damage an airplane.
A ground loop is an uncontrolled yaw on the ground that results in the airplane spinning around its vertical axis. In a tailwheel airplane, the aft CG makes ground loops a constant risk during any ground operation, but especially during landing and takeoff.
Ground loops are caused by an uncorrected yaw that builds momentum. The initial yaw can come from a crosswind, an asymmetric touchdown, a swerve during the rollout, brake application at the wrong time, or simply inattention. Once the yaw begins, the aft CG accelerates the rotation. If not caught immediately with rudder and possibly differential braking, the airplane will swap ends.
Stay ahead of the airplane. Keep your feet active on the rudder at all times during ground operations. Be prepared for a yaw in either direction. Make small, early corrections rather than large, late ones. The moment you feel the airplane start to yaw in a direction you did not command, correct it immediately.
Do not reach for the brakes. Differential braking is a fine tool for fine-tuning direction at taxi speed, and it is the wrong tool the moment a yaw is running away from you. Braking into a developing ground loop digs in the inside wheel, and that is how a swerve becomes a wingtip or a nose-over. The recovery inputs are in Chapter 6, they are throttle closed, full opposite rudder, and stick full aft, and there is no brake in them.
The best prevention is awareness. Know the wind, plan your approach, and fly the airplane all the way to the tiedown. The most dangerous moment is the one where you relax and think the landing is over.
Combining a crosswind with a short field adds another layer of complexity. The crosswind correction (wing-down) reduces your effective lift slightly, which increases your landing distance. You will need to be precise with your approach speed and aiming point. The slip technique you use for altitude management must now be coordinated with the crosswind correction, which can feel like you are managing two slips at once.
On takeoff from a short field in a crosswind, hold the airplane on the ground a little longer to build extra speed before liftoff. This gives you more control authority when you leave the ground. The trade-off is more runway used, so you need to know your distances.
In Phase 3, your instructor will introduce simulated engine failures during various phases of flight. The purpose is to prepare you for the real thing, and to practice spot landings in crosswind conditions.
When the engine quits (or is pulled to idle by your instructor), your priorities are the same as in any airplane: fly the airplane first, pick a landing spot, set up the best approach you can, and deal with the cause of the failure when time permits. The difference in a tailwheel airplane is that your forced landing will require the same tailwheel-specific skills you have been developing: proper touchdown attitude, stick back, active rudder, and directional control through the rollout.
If you are forced to land in a crosswind, all of the crosswind landing techniques you have learned still apply. The wind does not care that your engine is not running.
Emergencies in a tailwheel airplane follow the same priorities as in any other airplane: aviate, navigate, communicate. What changes is the part after the wheels touch, because the mass sits behind them, and an off-field arrival that would be over in a trainer is still being flown here.
standards/EMERGENCY-PROCEDURES.md governs this chapter and holds the completion standards you are graded against. This is the narrative version of it. Nothing about emergencies is required by 14 CFR 61.31(i), which asks only for takeoffs, landings, wheel landings, and go-arounds. All of this is North Aero's own standard, and you are being held to more than the regulation asks.
The immediate response to an engine failure is the same regardless of aircraft type: pitch for best glide speed, pick a landing site, attempt a restart if altitude permits, and communicate your situation. Best glide in this airplane is 75 MPH IAS. Hold it, and resist the pull to stretch the glide by raising the nose, which trades the only thing keeping your options open for a few seconds of feeling closer to the field.
The Luscombe is a light airplane with a relatively low wing loading. It will slow down quickly when the power is removed. Establish best glide immediately after the engine quits to preserve your options.
If altitude permits, work through the likely causes systematically:
| Item | Action |
|---|---|
| Fuel selector | Check on and switch tanks if applicable |
| Mixture | Full rich |
| Carburetor heat | On (full hot) |
| Magnetos | Both (check switch has not bumped off) |
| Primer | Locked |
Carburetor ice is the most likely cause of a power loss you will actually meet, and it is the one that gets missed, because it arrives slowly. What it looks like is a gradual loss of rpm at a fixed throttle setting, roughness, and a slow decay of performance that a busy pilot puts down to the airplane rather than to ice. A carburetted engine can accumulate induction ice across a wide range of temperature and humidity, including on warm days.
What to do is full carburetor heat, and leave it on. Expect the rpm to fall further before it recovers, because the melting ice goes through the engine on its way out. A pilot who applies heat, sees the rpm drop, and pulls the heat straight back off has confirmed the diagnosis and then undone the cure. Carburetor heat goes on for the descent and before any closed-throttle work as routine rather than as a reaction, which is what the handbook already directs.
Do not spend altitude troubleshooting low down. North Aero publishes no height at which the restart is abandoned, because the honest answer depends on the field you have picked and the glide you need to reach it. It is a briefing decision, not a number. If the engine quits below the height at which a restart could plausibly finish and still leave you arriving somewhere you chose, the restart is over and the whole of the remaining altitude goes into flying the airplane to the best surface available. Aviate first, and the order is not negotiable.
An engine failure immediately after takeoff is the most critical emergency in any airplane. In the Luscombe, the situation is compounded by the narrow gear and the need to maintain directional control through the rollout after touchdown.
The rule is straight ahead. Land ahead, or within a shallow turn of ahead, and accept the field you get. The turn back to the runway is the one that does not work. It costs more altitude than a pilot expects, it gets flown slower and steeper than intended, and it ends in a stall and a spin at a height with no recovery in it.
North Aero publishes no turnback altitude, and that is deliberate. The height at which a turnback stops being fatal moves with the wind, the runway remaining, the weight, the density altitude, and how fast the pilot actually lowers the nose. A published figure gets read as permission, and the pilot who has memorized one is the pilot who attempts the turn on the day it does not apply. What North Aero teaches instead is this: with no wind, not below traffic pattern altitude, and below that it is straight ahead. Circumstances move it, and they move it up more often than down.
The turnback is not taught in this program, not practiced, and not expected of you at any altitude. That is a North Aero standard rather than a figure out of any handbook, and it sits alongside the 10 knot solo crosswind limit.
The part that is specific to this airplane is what happens after the touchdown. On a rough surface, with the mass behind the wheels, it will try to swap ends the moment one wheel finds something the other does not. The stick comes back, the feet stay alive, and the airplane is flown until it has stopped moving. Glide speed for this one is 60 MPH IAS, which is lower than best glide because you are not trying to go anywhere.
The engine keeps running. The magnetos are self-contained and are not fed by the electrical system, so losing the whole bus is a communications and equipment problem rather than an engine problem. Students consistently expect the opposite, and this briefing is not finished until you have said it back out loud.
What you actually lose is the radio, the electrically driven instruments, and any electrical navigation equipment. At KSNS with the tower open, a radio failure is handled with light signals, and you are expected to know the signals before Lesson 1. Squawking 7600 only helps for as long as the transponder still has power to squawk with.
A go-around in the Luscombe requires more right rudder than you expect. The combination of full throttle, slow speed, and the torque effects described in Chapter 2 will produce a strong left-yawing tendency. Apply full power smoothly, add significant right rudder, and establish a positive climb before returning the carburetor heat to cold.
Do not hesitate to go around. A go-around is always the right call when a landing does not look right. There is no penalty for going around, and there is a substantial one for forcing a bad landing in a tailwheel airplane.
Practice go-arounds from various points in the approach and landing. You should be comfortable initiating a go-around from short final, from the flare, and from a bounced landing. Each situation has slightly different technique, and all require aggressive rudder input when the power comes up.
As it starts: throttle closed if it is not already, full opposite rudder, stick full aft to plant the tailwheel and give it something to steer with. This is the second in which the airplane can still be saved, and it is why the first lesson is spent taxiing.
Not the brakes. Differential braking into a developing ground loop digs in the inside wheel, and that is how a swerve becomes a wingtip or a nose-over. The brakes are how a pilot converts a recoverable event into an insurance claim.
Prevention is always better than recovery. Keep your feet active on the rudder pedals during every phase of ground operations. If you catch a swerve in the first few degrees, a small rudder correction is all it takes. If you let it develop past 20 or 30 degrees, you may not be able to stop it.
If a ground loop has developed to the point that the airplane is sliding sideways, ride it out. Trying to save it with brakes at this point will likely cause more damage, not less. Protect yourself, let the airplane dissipate its energy, and deal with the situation on the ground.
Good judgment keeps tailwheel pilots safe more than good technique. This chapter covers the decision-making framework you should apply before and during every tailwheel flight.
A tailwheel endorsement expands what you can fly, but it does not change the fact that you are building proficiency in a new skill. Set personal minimums that reflect your actual experience level, not the minimums of the certificate you hold.
Two things get confused here and they are not the same, so North Aero names them separately. Operating limits are limits North Aero sets and you are bound by. There are two of them: a crosswind component of 10 knots for solo flight, and no passengers until 5 hours solo in type. Personal minimums are your own. You write them on the intake form, they are reviewed at your Checkout and at your annual currency flight, they are kept in your file, and they carry no contractual force because they belong to you.
These are starting points for the personal minimums column, not the operating limits:
| Condition | Suggested minimum |
|---|---|
| Ceiling | 3,000 ft AGL |
| Visibility | 5 SM |
| Surface wind | 12 kt |
| Crosswind component | 5 kt, inside the 10 kt operating limit |
| Gusts | 5 kt above steady |
| Runway surface | Paved, dry |
Your instructor will help you set minimums that match your skill level, and you widen them on demonstrated proficiency rather than on the calendar. The two operating limits do not move that way. They move when North Aero moves them.
Before every flight, evaluate risk across four categories:
| Category | Tailwheel considerations |
|---|---|
| Pilot | When did you last fly the Luscombe? Tailwheel skills are perishable. If it has been more than two weeks, plan on a few trips around the pattern before heading out on a cross-country. |
| Aircraft | Is the tailwheel steering functional and free? Are the tires in good condition? Is the tailwheel spring intact? These items are critical in a tailwheel airplane and deserve extra attention during preflight. |
| enVironment | Wind is the single biggest environmental factor for tailwheel operations. Check the winds aloft, the surface winds at your destination, and the forecast for your return. A calm morning can become a gusty afternoon. |
| External pressures | Do not let passengers, schedules, or "get-there-itis" push you into conditions beyond your current skill level. A tailwheel airplane rewards patience and punishes overconfidence. |
Two different requirements apply to you and it is worth keeping them apart.
The regulation. 14 CFR 61.57(a) requires three takeoffs and landings within the preceding 90 days to carry passengers, and in a tailwheel airplane those landings must be to a full stop. That is the legal minimum for carrying somebody else.
North Aero Currency. Three landings in N1302B within the preceding 60 days. This is the school's standard and it is the one that decides whether you can take the airplane out without an instructor. Falling outside it is not a violation of anything and carries no penalty; it means your next flight is with a CFI. That flight has a name, Re-currency, because a lapse is a scheduling condition rather than a failing.
Neither one is a measure of competence. Currency and proficiency are different claims.
Tailwheel skills degrade faster than nosewheel skills, because the margin is narrower and the inputs have to be more precise. If you have been away from the Luscombe for more than a month, book a session with your instructor before you go alone. Nobody at North Aero will think less of you for it, and the pilots who do this are not the ones who bend airplanes.
Most tailwheel incidents happen in the traffic pattern and on the runway. The decisions you make in the last 200 feet of every flight matter more than anything else. Build these habits:
Establish a go-around gate. Pick a point on every approach where you will go around if the approach is not stabilized. In the Luscombe, that gate should be no lower than 100 feet AGL on a visual approach. If you are not on speed, on glidepath, and aligned with the runway at the gate, go around. No exceptions.
Brief the wind on every approach. Before turning base, say the wind out loud. Know whether you are landing in a crosswind and from which side. This two-second habit prevents the surprise of discovering a crosswind in the flare.
Commit to a landing type. Decide before the flare whether you are making a three-point or a wheel landing. Do not change your mind in the roundout. Each landing type has a different sight picture, different touchdown attitude, and different energy management. Switching mid-flare leads to flat, fast touchdowns that invite bounces and ground loops.
The best tailwheel pilots are not the ones who never ground loop. They are the ones who recognize a developing problem early and take action before it becomes a ground loop. Active feet, quick decisions, and the willingness to go around are what separate a safe tailwheel pilot from a lucky one.
All speeds in MPH, which is what the airspeed indicator in this airplane is marked in. Every row says where it came from, because the three standings are not interchangeable. Sourced means it was read from a document that governs N1302B. Reference means it was read from the Luscombe SLSA-8 handbook, a Light Sport airplane at a lower gross weight, and may be taught as background but is not a limit for this airframe. Open item means no source has been found and no figure is published.
| Speed | MPH | What it is | Standing |
|---|---|---|---|
| Vs | 48 | Stall, power off | Sourced |
| Normal operating range | 48 to 112 | The green arc | Sourced |
| Vx | 65 | Best angle of climb | Reference |
| Vy | 72 | Best rate of climb | Sourced |
| Best glide | 75 | Engine out, adopted for this airplane by the CFI | Sourced |
| Engine failure after takeoff | 60 | Glide speed for the straight-ahead landing | Reference |
| Cruising speed | 112 | Level flight | Sourced |
| Va | 115 | Design maneuvering, which is 100 kt | Reference |
| Turbulent air | 115 | Rough air penetration | Reference |
| Maximum speed | 125 | Level flight, full throttle | Sourced |
| Vne | 145 | Never exceed. Red line | Sourced |
| Approach speed | not established | Flown to the sight picture and the feel | Open item |
| Touchdown, three-point | not established | Full stall, so the airplane picks it | Open item |
| Touchdown, wheel landing | not established | Flown on, so you pick it | Open item |
Sourced rows from the Owner's Handbook of Operation, Silvair Model 8E, operating recommendations, specifications, and performance information. Best glide from the SLSA-8 handbook section 6, adopted for N1302B by the CFI on 2026-08-17. Reference rows from the SLSA-8 handbook sections 3, 5, and 7. Canonical in AIRCRAFT.md.
There is no maximum flap extended speed. The Luscombe has no flaps. Revisions of this manual before 2026-08-17 carried one, and carried a memory item telling you to set flaps after an engine failure. Both are gone. If you find that figure in an older copy of this document, throw the copy away.
There is no maximum demonstrated crosswind component. The handbook states none, which is ordinary for an airplane certificated in this era, and "the handbook gives no figure" is the whole and honest answer. Do not borrow the SLSA-8's, which belongs to a different airplane. What binds you instead is a North Aero operating limit: a crosswind component of 10 knots for solo flight. That limit stands on its own and does not depend on any handbook figure.
Two speeds that appeared in earlier revisions are worth naming so that nobody puts them back. A never exceed speed of 160 was published here for months against a red line of 145, which meant this document was inviting you past the red line. A maneuvering speed of 97 matched no source at all.
In Chapter 1, under Operating limits, and not repeated here. The short version is that the governing documents for the installed O-200 have not been read, that the figures printed in Chapter 1 are read from a different airplane's handbook and marked as such, and that the markings on the tachometer and the oil gauges in front of you are certificated markings and are the most direct source this airframe has. When the instrument and the page disagree, the instrument wins.
There are three memory items in this program and these are they. They are memory items because they are short enough to be memorized. Everything else in Chapter 6 is briefed, discussed, and flown, and is not committed to memory. A long list does not get memorized, and an unmemorized memory item is worse than a checklist, because it gets trusted without being read.
| Attitude | Glide, trimmed, immediately |
| Airspeed | 60 MPH IAS |
| Direction | Straight ahead, or a shallow turn to avoid an obstruction |
| Mixture | Idle cutoff before touchdown |
| Magnetos | Off |
| Fuel selector | Off |
| Through the rollout | Stick back, rudder working, fly it until it stops |
| Airspeed | Best glide, 75 MPH IAS |
| Field | Select, and turn toward it |
| Restart flow | Fuel selector, mixture, carburetor heat, magnetos, primer |
| Communicate | 121.5 |
| Transponder | 7700 |
| Before touchdown | Mixture idle cutoff, magnetos off, fuel selector off |
| Cranking | Continue, to draw the fire into the engine |
| Mixture | Idle cutoff |
| Fuel selector | Off |
| If it persists | Get out, extinguisher, call for the fire service |
No memory item in this program tells you to touch a control this airplane does not have. That sentence is in here because it once did.
These three are reproduced from standards/EMERGENCY-PROCEDURES.md, which governs. If this appendix and that document ever disagree, that document is right and this one has drifted.
This appendix is a study aid, not a cockpit document. It gives the items and their order so you can learn the flow at a desk. The checklist in the airplane is the one you run in the airplane, and where the two disagree, the one in the airplane governs.
You will notice there are almost no numbers here. That is deliberate. The rpm settings, the magneto drop limits, the oil quantities, and the usable fuel all belong to the installed engine and to this airframe, and the documents that state them have not been read. North Aero does not print a number it cannot source, so the settings come off the placards, the instrument markings, and the cockpit checklist. Every one of them is listed as an open item in AIRCRAFT.md, with the document that would close it named.
| Item | Check |
|---|---|
| Aircraft documents | ARROW on board and current |
| Control lock | Removed |
| Fuel quantity | Dip both tanks. Capacity is 30 gal. Read the selector placard for what is usable |
| Fuel quality | Drain sumps, check for water and correct color |
| Oil level | Check dipstick against its markings and the placard |
| Fuel selector | Check for leaks, proper operation |
| Flight controls | Free and correct |
| Tailwheel and spring | Secure, steering functional, tire condition |
| Main gear and tires | Condition, proper inflation |
| Propeller | Nicks, security, spinner condition |
| Cowling and engine | Secure, no leaks, exhaust system intact |
| Wings and struts | Condition, no damage, skin and rivets |
| Control surfaces | Secure, free movement, no damage |
| Pitot and static ports | Clear and unobstructed |
| Windscreen | Clean, no cracks |
| Item | Action |
|---|---|
| Preflight | Complete |
| Seat belts | Fastened |
| Brakes | Set / hold |
| Fuel selector | LEFT or RIGHT tank. There is no BOTH |
| Mixture | Full rich |
| Carburetor heat | Cold |
| Throttle | Cracked |
| Prime | Per the cockpit checklist, more when cold, and conservatively |
| Primer | Locked |
| Area | Clear |
| Call | "Clear prop!" |
| Magnetos | Both |
| Starter | Engage |
| Oil pressure | Check within 30 seconds, shut down if it does not register |
| Warm-up | Fast idle per the cockpit checklist, until oil temperature moves |
| Item | Action |
|---|---|
| Position | Into wind if possible, tail pointed away from other aircraft |
| Brakes | Set / hold |
| Flight controls | Free and correct |
| Flight instruments | Set and checked |
| Fuel selector | On, proper tank |
| Mixture | Full rich (or leaned for field elevation) |
| Throttle | Run-up rpm per the cockpit checklist |
| Magnetos | Check each. Drop and differential limits per the cockpit checklist |
| Carburetor heat | Check, note the rpm drop, return to cold |
| Engine instruments | Oil pressure and temperature in the green arcs on the gauges |
| Throttle | Idle check, then set for taxi |
| Trim | Set for takeoff |
| Seat belts | Secure |
| Door/canopy | Latched and secure |
| Item | Action |
|---|---|
| Power | Cruise setting inside the tachometer green arc |
| Mixture | Lean as appropriate for altitude |
| Engine instruments | Monitor oil pressure and temperature |
| Fuel | Monitor quantity, switch tanks as needed |
| Item | Action |
|---|---|
| Fuel selector | Fullest tank. There is no BOTH position |
| Mixture | Full rich |
| Carburetor heat | On, applied on downwind and left on |
| Seat belts | Secure |
| Landing type | Brief: three-point or wheel landing |
| Wind | Brief: direction, speed, crosswind component |
| Item | Action |
|---|---|
| Carburetor heat | Cold |
| Transponder | Standby |
| Taxi | Full aft stick, active rudder, S-turns for visibility |
| At parking | Brakes set |
| Throttle | Idle, and let it cool before shutdown |
| Mixture | Idle cutoff (engine shutdown) |
| Magnetos | Off |
| Master switch | Off |
| Fuel selector | Off |
| Control lock | Install |
| Tie-downs | Secure wings and tail |
To act as pilot in command of a tailwheel airplane, you must receive and log flight training from an authorized instructor in a tailwheel airplane and receive a one-time endorsement in your logbook certifying that you are proficient in the following areas:
Those three clauses decompose into six elements. Every one is introduced in one lesson and brought to standard in another, and none of them is left to be picked up along the way.
| Element | Clause | Introduced | To standard |
|---|---|---|---|
| Normal takeoff | (i)(1)(i) | L1, demonstrated | L2 |
| Normal landing | (i)(1)(i) | L1, demonstrated | L3 |
| Wheel landing | (i)(1)(ii) | L2, demonstrated | L3 |
| Go-around | (i)(1)(iii) | L2 | L3 |
| Crosswind takeoff | (i)(1)(i) | L4 | L5 |
| Crosswind landing | (i)(1)(i) | L4 | L5 |
Wheel landings are required. The regulation excepts them only where the manufacturer has recommended against them, and no such recommendation exists for the Luscombe 8E. So the element is trained and endorsed like the other five, and an older reading of this appendix that treated it as optional was wrong.
Your progress is tracked against both views, the lesson list and this element list, on one record. The endorsement decision rests on the element view showing PROFICIENT against all six, and not on the lesson view showing five lessons finished. Those are different claims and only one of them supports an endorsement.
There is no knowledge test, no practical test, and no minimum number of flight hours for the tailwheel endorsement. Your instructor determines when you have demonstrated the proficiency, and that determination is what the endorsement records. North Aero publishes no typical hour range, deliberately: the syllabus is 9.5 dual hours across five lessons, some pilots need an additional lesson or two to reach a standard, and a range printed next to that reads as a prediction about you rather than an average about everybody.
One exemption is worth knowing about. Under 61.31(i)(2), a pilot who logged pilot in command time in a tailwheel airplane before 15 April 1991 needs neither the training nor the endorsement.
Your instructor will make the following endorsement in your logbook upon successful completion of the program:
I certify that [First name, MI, Last name], [grade of pilot certificate], [certificate number], has received the required training of 14 CFR 61.31(i) in a [M/M] tailwheel airplane. I have determined that they are proficient in the operation of a tailwheel airplane.
/s/ [date] [instructor name] [certificate number] [expiration date]
For N1302B, [M/M] is Luscombe 8E. The wording is AC 61-65K Appendix A item A.75, dated 11/14/25. Any endorsement text you find that reads "[he or she]" is quoting a cancelled revision.
After receiving your endorsement, you must maintain currency to carry passengers. Per 14 CFR 61.57(a)(1), you need three takeoffs and three landings in a tailwheel airplane within the preceding 90 days. These landings must be to a full stop.
Legal currency is not the same as proficiency. Even if you are technically current, if you have not flown a tailwheel airplane in several weeks, a quick session with your instructor is always a good idea before flying solo. The membership program at North Aero makes it easy to fly regularly and maintain true proficiency.
The endorsement is portable. It attaches to you rather than to the airplane, it does not expire, and you can take it to any tailwheel airplane and any school. It is also not permission to take N1302B out on your own.
Two more things stand between you and that, and they are separate records. Club membership is what makes solo rental of this airplane available at all and sets the aircraft rate. The Checkout is North Aero's own determination that you may fly it without an instructor aboard, and it covers what the endorsement does not: this airframe, this field, and this school's procedures. For a student finishing Lesson 5 it is a form and a conversation in the same session rather than another billable hour. After that, staying Current is three landings in the airplane inside 60 days.
Then keep flying it. Most of what this airplane has to teach starts after the endorsement, and the pilots who get it are the ones who fly it in November as well as in June.
Use these pages to record questions, observations, and notes from your ground and flight sessions.